
Accessing Delivery Fee Campaigns
Creating a Delivery Fee Campaign
Viewing and Editing a Campaign
How the Campaign Appears to Customers
Summary
Delivery Fee Campaigns let you run promotions that reduce or remove the delivery fee on a customer's order. For example, you might offer free delivery for a limited time, take a percentage off the fee for loyalty members, or apply a fixed-dollar discount at a particular location.
You build a campaign using a step-by-step wizard. It walks you through choosing a template, setting who is eligible, picking the discount type and amount, scheduling the campaign, and adding any optional targeting rules such as a minimum order value, location, or day of the week.
To use this feature, you will need access to the following roles:
- Delivery Campaigns Update Access
- Delivery Campaigns View Access
Please contact the Redcat Support Team if you require these roles.
This article describes the process for accessing delivery campaigns and creating a new delivery fee campaign.
Note: Delivery fee campaigns apply to Redcat web and mobile ordering only. They do not apply to delivery aggregators (for example, Uber Eats).
Important: Delivery campaigns are different to coupons. Unlike coupons, delivery campaigns do not let you configure specific content to display in the mobile or web ordering experience. You will separately need to advise terms and conditions, marketing communications, and any other relevant messaging. The Advertisements feature is separately available.
Accessing Delivery Fee Campaigns
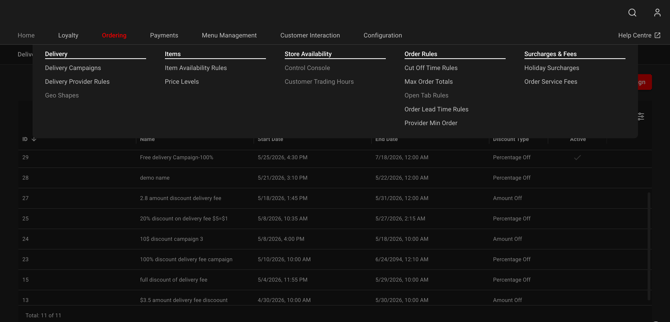
You can access delivery campaigns in Polygon Central 2 at Ordering | Delivery | Delivery Campaigns.
The Delivery Campaigns tab lists your existing campaigns, including the campaign ID, Name, Start Date, End Date, Discount Type, and whether the campaign is currently Active.
You can use the more options (ellipsis) button next to each column heading to sort or filter on that column. You can use the filter icon to add or remove columns from the list view.
Creating a Delivery Fee Campaign
To create a new campaign, use the + Add Delivery Campaign button. This opens the campaign wizard, which steps you through the following tabs: Templates, Eligibility, Discount Type, Amount, Details, Targeting, and Summary. Use the Continue button at the bottom of each tab to move to the next step.
Note: The input steps in the wizard are dynamic and change primarily based on your selection in the Eligibility step. For the purposes of these instructions, All current members has been selected.
Templates
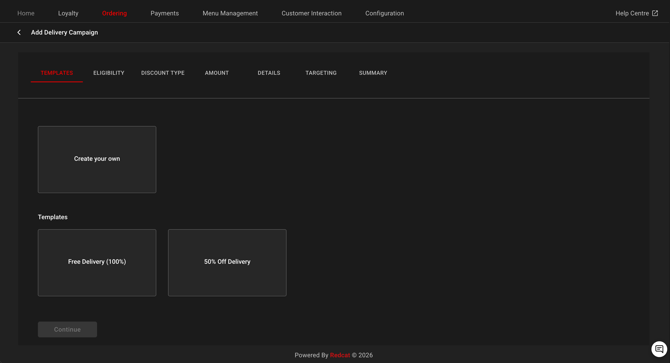
Choose a starting point for your campaign:
- Create your own - build a campaign from scratch with your own settings.
- Free Delivery (100%) - a pre-set template that removes the full delivery fee.
- 50% Off Delivery - a pre-set template that discounts the delivery fee by half.
Selecting a template pre-fills the relevant discount type and amount, which you can adjust in later steps.
Eligibility
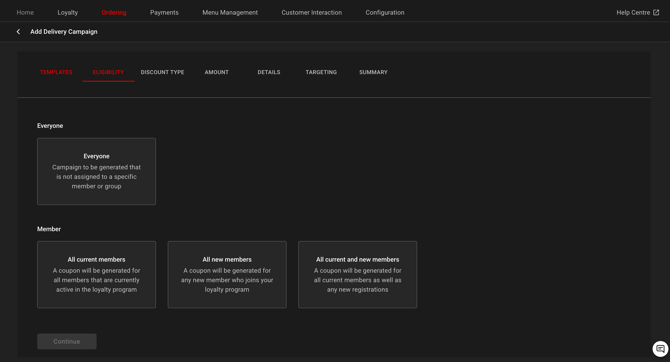
Select who the campaign applies to:
- Everyone - the campaign is generated for all customers and is not assigned to a specific member or group.
- All current members - the campaign is generated for all members currently active in the loyalty program.
- All new members - the campaign is generated for any new member who joins your loyalty program.
- All current and new members - the campaign is generated for all current members as well as any new registrations.
Discount Type
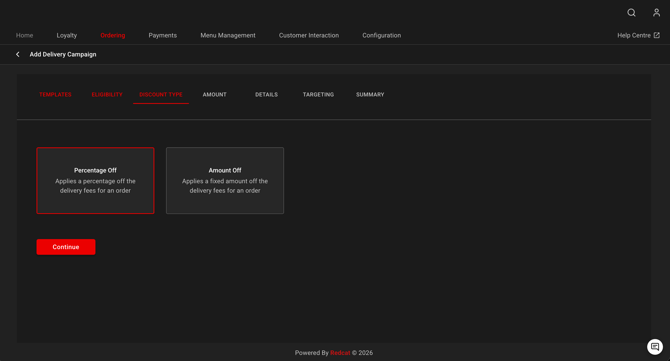
Choose how the discount is applied to the delivery fee:
- Percentage Off - applies a percentage off the delivery fee for an order.
- Amount Off - applies a fixed dollar amount off the delivery fee for an order.
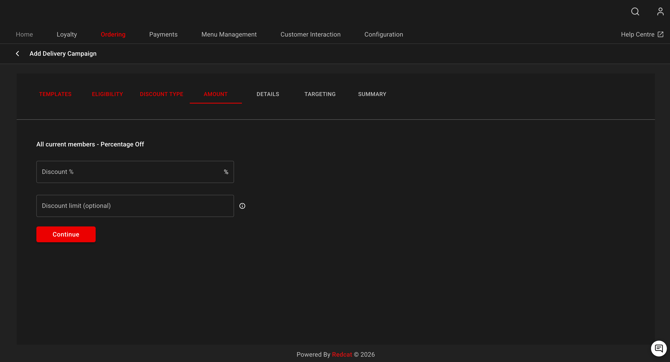
Amount
Enter the value of the discount:
- For a percentage campaign, enter the Discount %.
- For an amount campaign, enter the fixed amount to be discounted.
- Optionally, enter a Discount limit to cap the maximum value of the discount that can be applied to any single order. This only applies for a percentage coupon.
Details
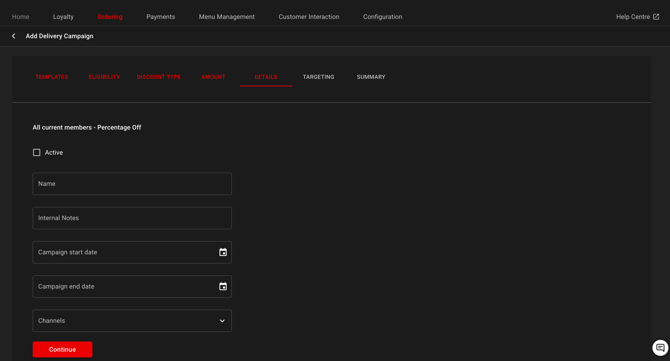
Set the core details of the campaign:
- Tick the Active box to make the campaign live.
Important: If you do not tick this box, the campaign benefits will not apply to customers, even if they meet the eligibility criteria.
- Enter the campaign Name.
- Optionally, add Internal Notes for your team's reference.
- Set the Campaign start date and Campaign end date using the calendar pop-up.
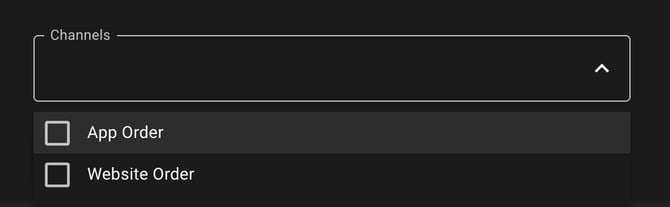
- Select the Channels the campaign applies to from the drop-down list: App Order and/or Website Order. Be sure to nominate which ordering channels you wish to include. If you leave this section blank, the campaign will default to both channels.
Targeting
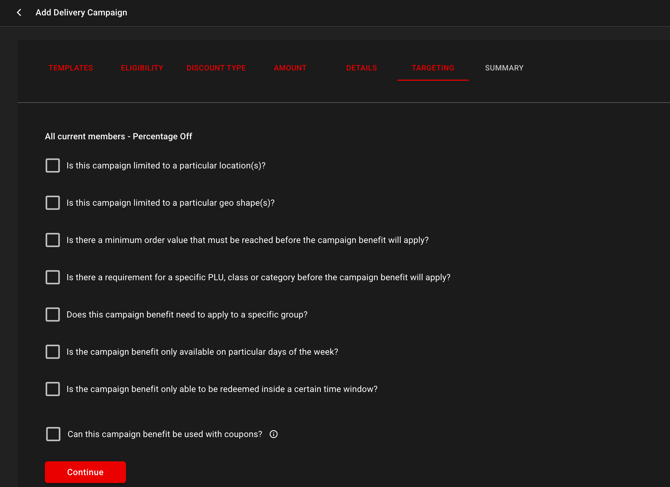
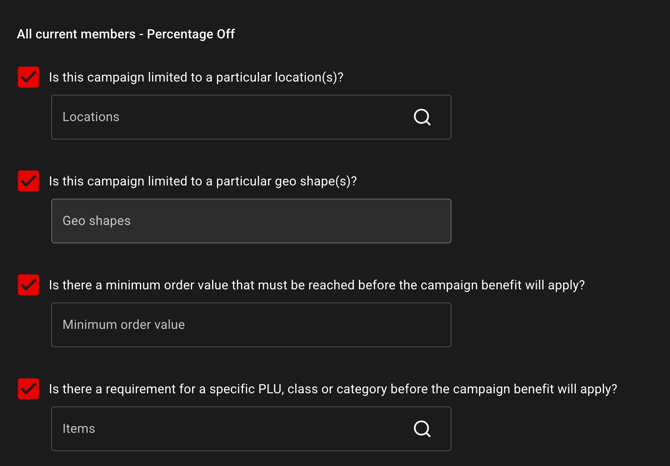
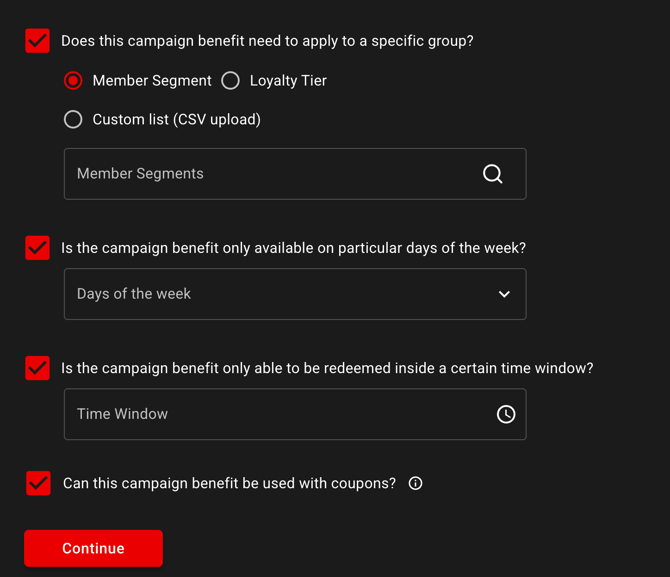
The Targeting tab lets you add optional conditions that must be met before the campaign benefit applies. Each condition is turned on by ticking its checkbox, which then reveals the relevant field(s) to complete. Leave a checkbox unticked to skip that condition.
- Is this campaign limited to a particular location(s)? - search for and select the applicable Locations.
- Is this campaign limited to a particular geo shape(s)? - select the applicable Geo shapes.
Important: You must nominate a location before you can select any geo shapes, as only the geo shapes related to your selected location(s) will be available. If you select geo shapes, any locations you selected without a corresponding geo shape will be ignored. In other words, set up your campaign to reference either locations or geo shapes.
- Is there a minimum order value that must be reached before the campaign benefit will apply? - enter the Minimum order value.
- Is there a requirement for a specific PLU, class or category before the campaign benefit will apply? - search for and select the applicable Items.
- Does this campaign benefit need to apply to a specific group? - choose Member Segment, Loyalty Tier, or Custom list (CSV upload), then select or upload the relevant group.
Important: If you are uploading a CSV file, it will need 1 column with a header "memberid" and list of member recids.
- Is the campaign benefit only available on particular days of the week? - select the applicable Days of the week.
- Is the campaign benefit only able to be redeemed inside a certain time window? - set the applicable Time Window.
- Can this campaign benefit be used with coupons? - tick to allow the campaign benefit to be combined with coupons.
Campaign Summary
The Summary tab shows a review of all the settings you have configured across the previous steps. Check the details, then use the Save button to record the campaign.
Once saved, the campaign appears in the Delivery Campaigns list and will run according to its scheduled dates and Active status.
Viewing and Editing a Campaign
Once a campaign has been set up, you can click on it in the summary table to view and edit its details.
Note: Not all details will be editable once a campaign has been initially configured.

How the Campaign Appears to Customers
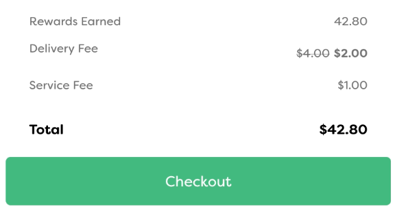
When a delivery fee campaign applies to an order, the discount shows in the order summary in the web and mobile ordering channels. The original delivery fee is struck through and replaced with the discounted (or free) fee, so the customer can see the saving at checkout.
Article Change Log
| Date | Record of Change | Author |
| July 2026 | Creation of article to support the launch of the new Delivery Campaigns feature. | A Crosland |